This sewing project was a perfect second step for us! We made scrunchies for our first project and followed it up with this fun bunting! It was perfect for our apple themed week! (It would also be a fun back to school decoration you can store for years to come!)
Getting Started
To get started you’ll need a few things:
1/8 of a yard of 3 different fabric designs (I chose to use cotton because it’s an easy fabric to work with but you can choose something different if you’d prefer.)
White Thread
1/4 inch ribbon (any color of your choice, I used red)
Fluff stuffing
1 page green felt
1 page brown felt
Don't forget to fold your fabric before cutting.
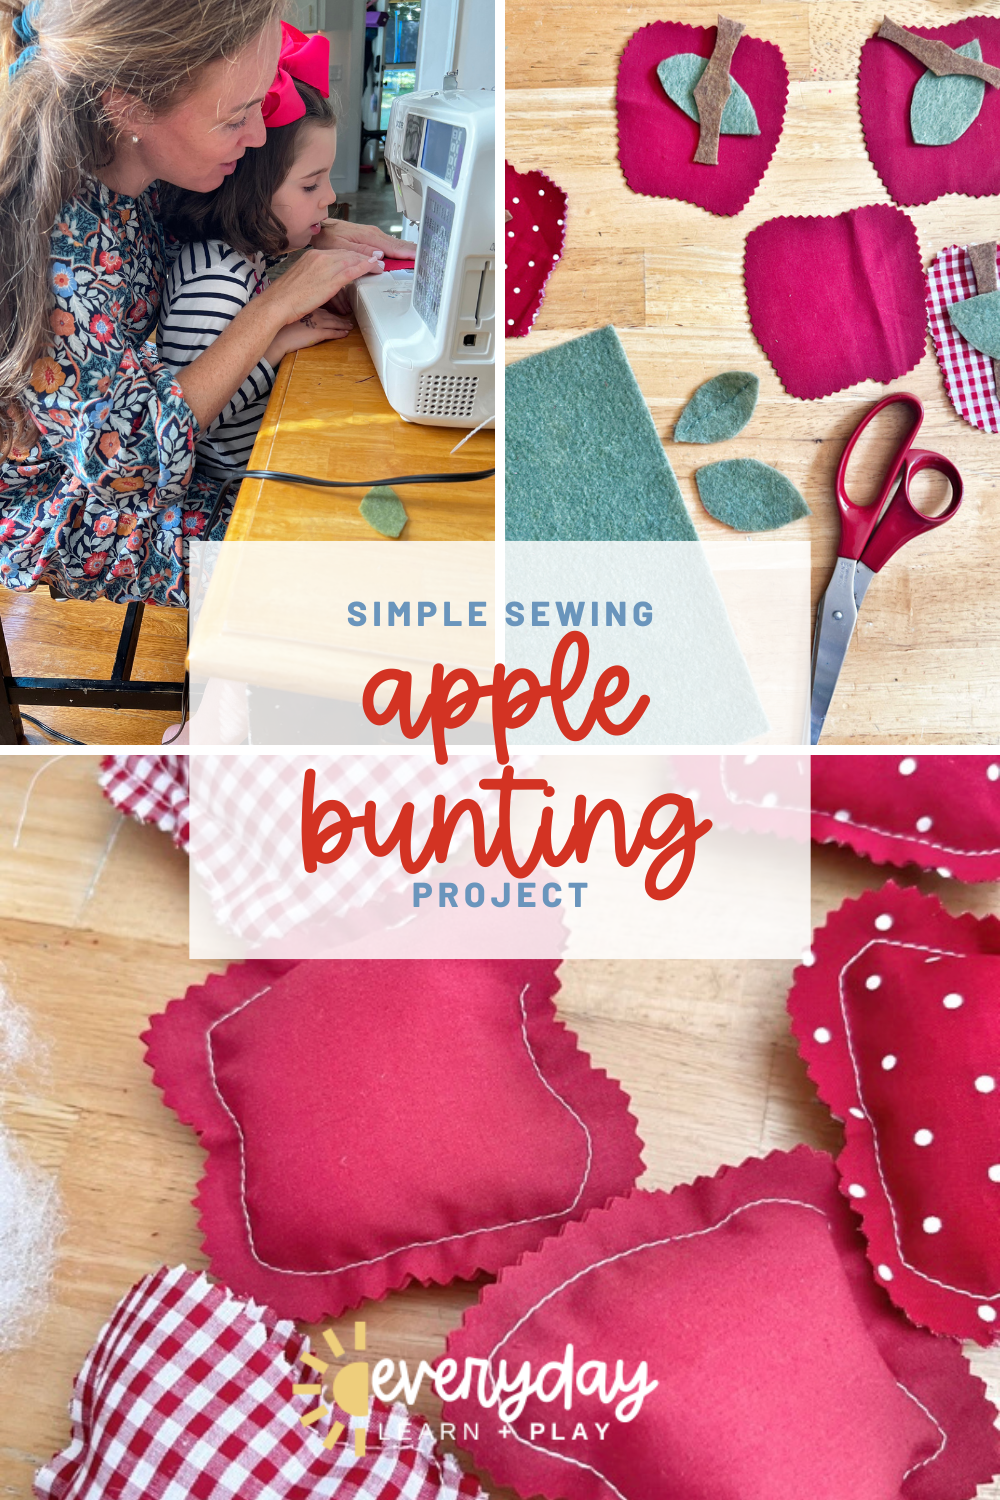
To begin, you’ll cut out the apple shapes from your fabric. Make sure to fold the fabric in half and then cut out your pattern. This will give you both sides of your apple shape. I chose to use pinking shears to cut the apple designs. This will not only keep the fabric from fraying as much but will also give a cute, rustic sort of look!
Pinking Shears aren't necessary but they do give an added touch to the apples.
Once you’ve cut out your apples it’s time to start sewing! Make sure the “right sides” (the side with the design you want to see) are facing out on both sides of the apple. Then sew around the edge leaving about 1/4-1/8 of an inch from the raw edge. DO NOT sew the complete apple shape. Be sure to leave a small (but big enough to get a finger or two down) opening on the side of the apple. This is where you will add the fluffy stuffing.
You’ll fill the apple shapes with a little fluffy stuffing (to whatever your liking) and then sew them shut following the place you stopped sewing to keep the opening and then slightly overlapping the place where you began.
I liked to make my opening on the top/side because we can get a little messy with sewing but I knew the felt leaves would mostly cover up any wiggly lines. (This will make sense in a minute.)
We added a hand stitched "vein" to the leaf to make it a little extra special.
Then to finish off the apples I folded the brown stem piece in half and sewed it on to the apple with the sewing machine in a tight line at the base of the stem. It should create a loop at the top. This will be how you string it on to the ribbon to create the bunting.
Finally we added the little green leaf with a criss-cross x stitch at the base of the stem. To add a little dimension and creativity MJ and I backstitched veins into the leaves but that’s totally optional.
Last step, simply stretch your ribbon across the area you want your bunting to span. String the apples on to the ribbon and secure the ribbon. Ta-da! You did it! Second sewing project in the books!
*Side note, these could also easily be made as pumpkins with orange fabric. The pattern PDF includes a pumpkin design option as well.
I hope this tutorial was helpful and inspiration for a fun sewing project together with your sweet ones! Have questions about the project? Feel free to reach out, I’m always happy to help! Hello@everydaylearnandplay.com
Carla Snipes
Carla is a teacher turned SAHM adventuring into homeschool preschool and beyond. Seeing evidence of God's grace each day and inspiring mamas with learn + PLAY fun at home.
If you liked this project, you'll love our scrunchies project!
The make great birthday gifts or stocking stuffers (hint hint)


No Comments